Do you want a Lumo socket?
The socket type determines which measurement reference and which built-in offset the calculator uses.
How do you want to determine your socket size?
Choose photo measurement with a quality check, or manual measurement with a tape.
Lumo socket sizes
Each Lumo socket size is a length letter (A–F) plus a circumference number (1–4). Use your measured stump length and circumference to read off the size.
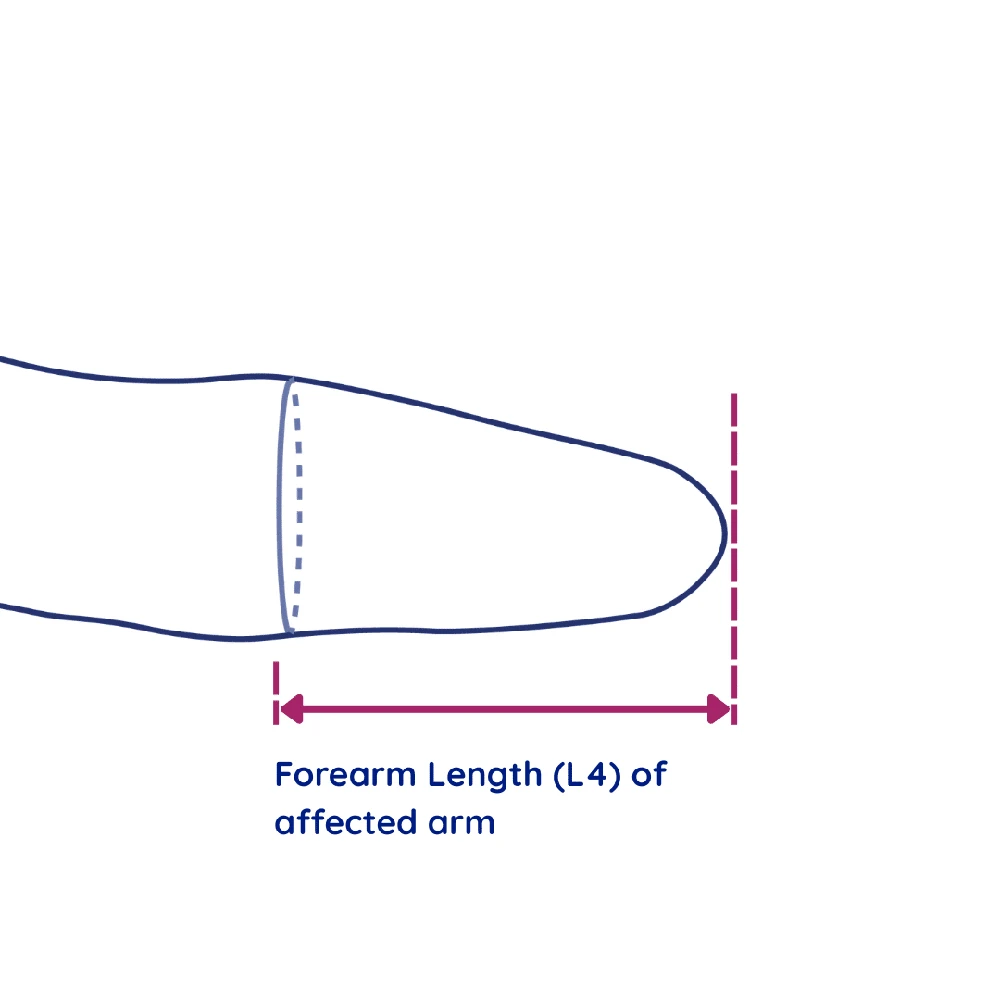
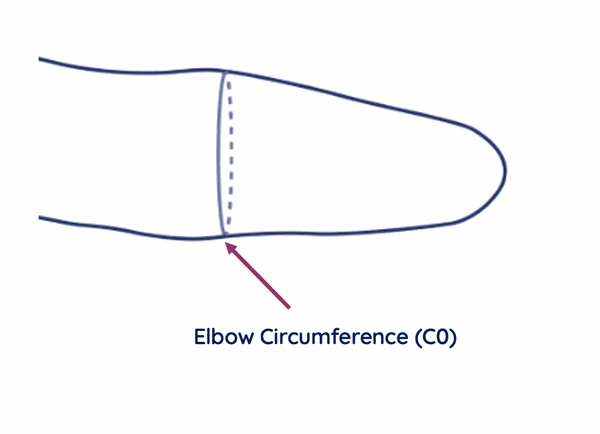
| Stump length L4 (mm) | |||||||
|---|---|---|---|---|---|---|---|
| A45–50 | B51–65 | C66–85 | D86–105 | E106–125 | F126–145 | ||
| Circumference C0 (mm) | 1110–130 | A1 | B1 | C1 | D1 | E1 | F1 |
| 2131–155 | A2 | B2 | C2 | D2 | E2 | F2 | |
| 3156–190 | A3 | B3 | C3 | D3 | E3 | F3 | |
| 4191–235 | A4 | B4 | C4 | D4 | E4 | F4 | |
The socket takes a TPU insert (always in 5 mm steps): 5 mm for size A, 10 mm for size B, 15 mm for the rest.
Next, the app computes the recommended spacer.
Print & Validate Template
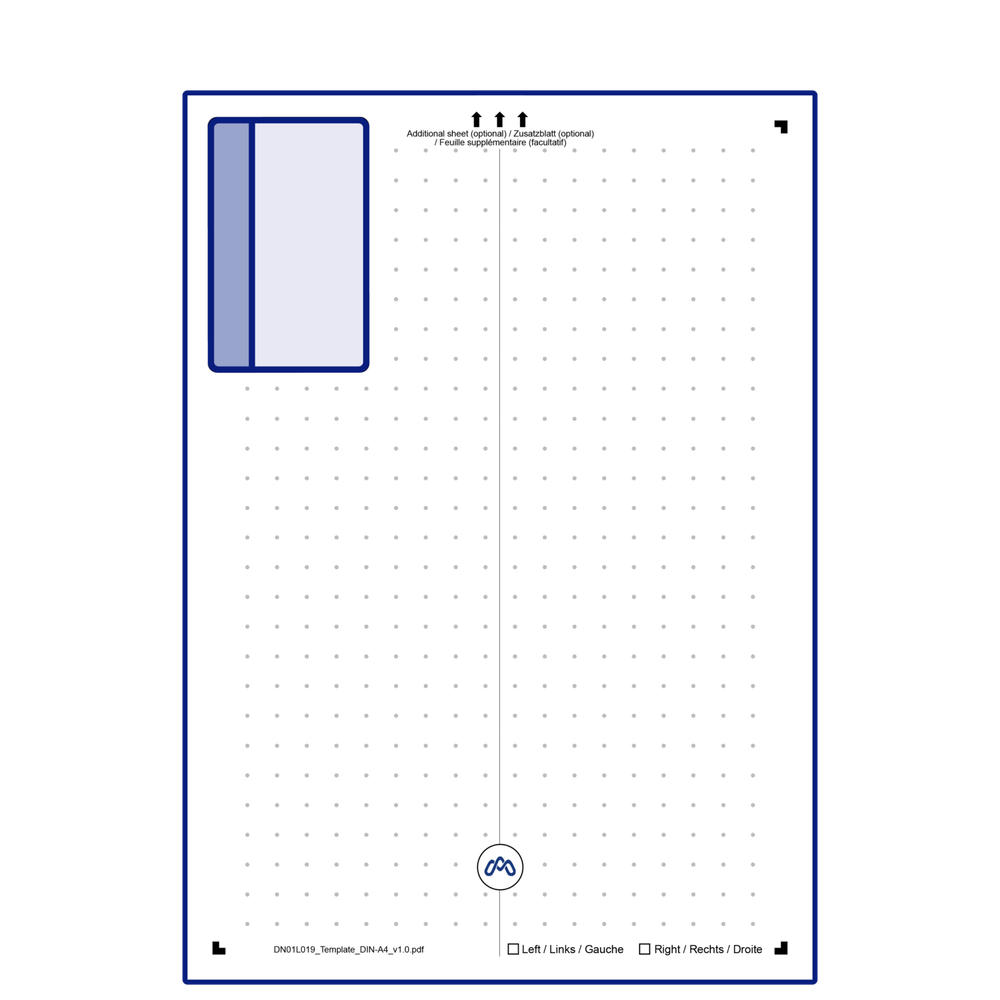
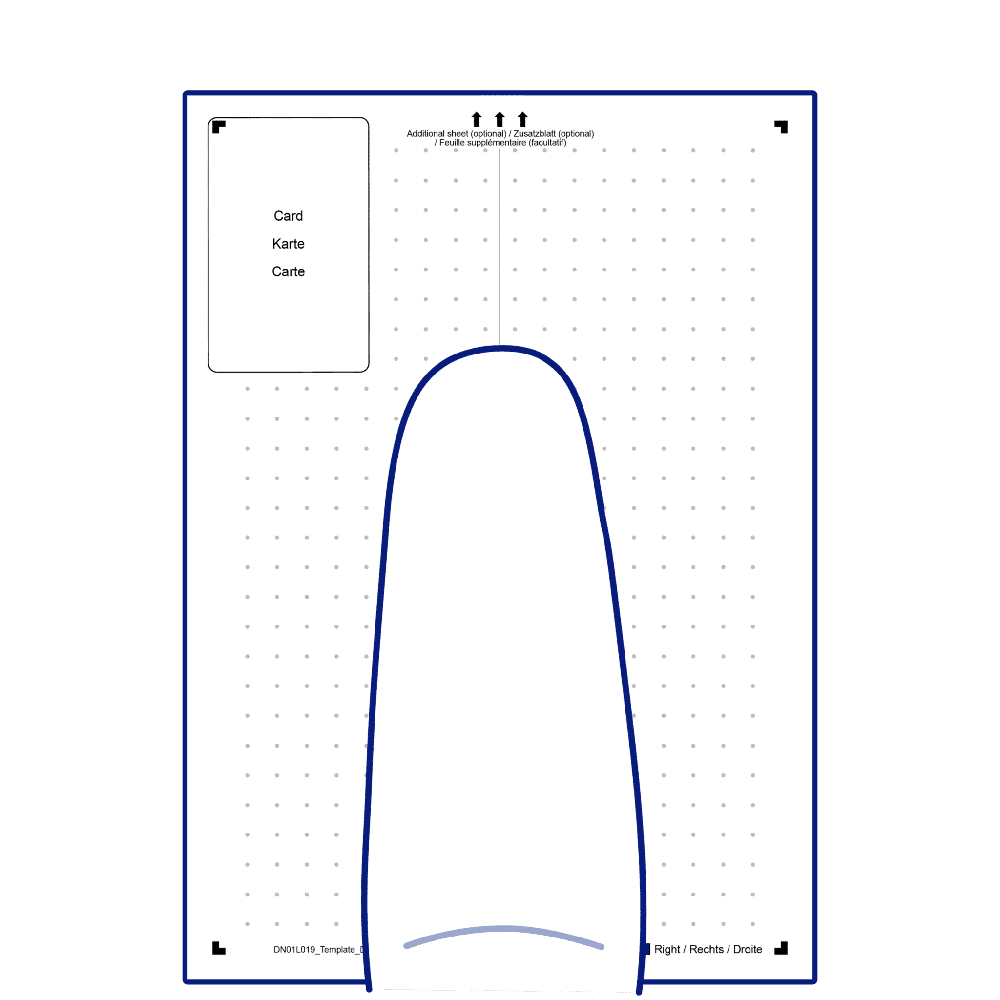
Print the macu4 measurement template at 100% scale (no scaling). Make sure you use a credit-card-sized card to control that the template was printed correctly — place it on the card field, it must fit exactly. Note: a business card does NOT have credit-card-sized dimensions. Leave the card on the template for the photos.
Mark Elbow Crease
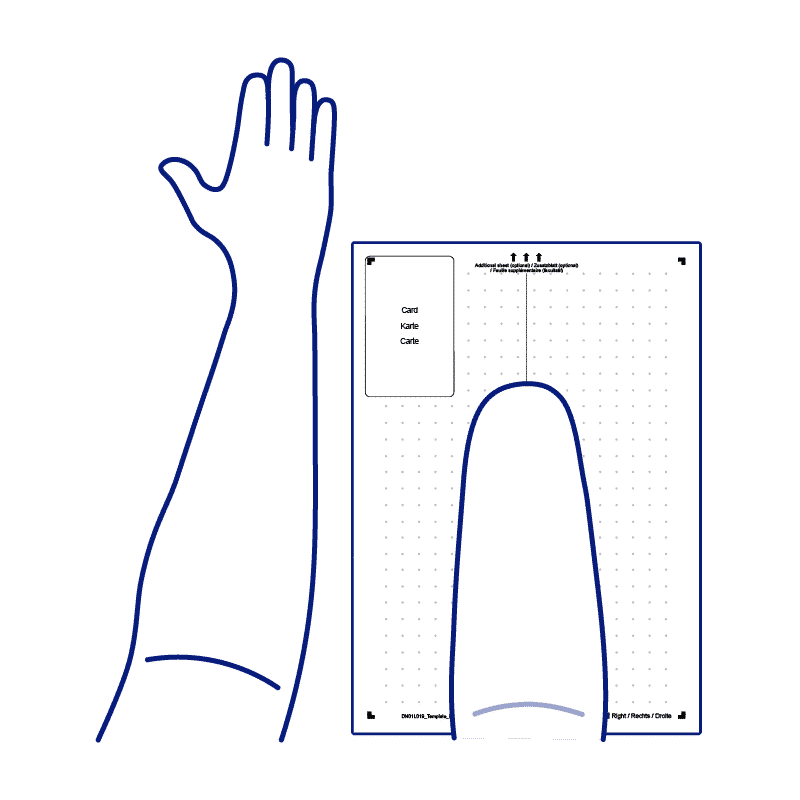
Using a skin-friendly pen, draw a straight line through the elbow crease. This serves as a reference for the photos.
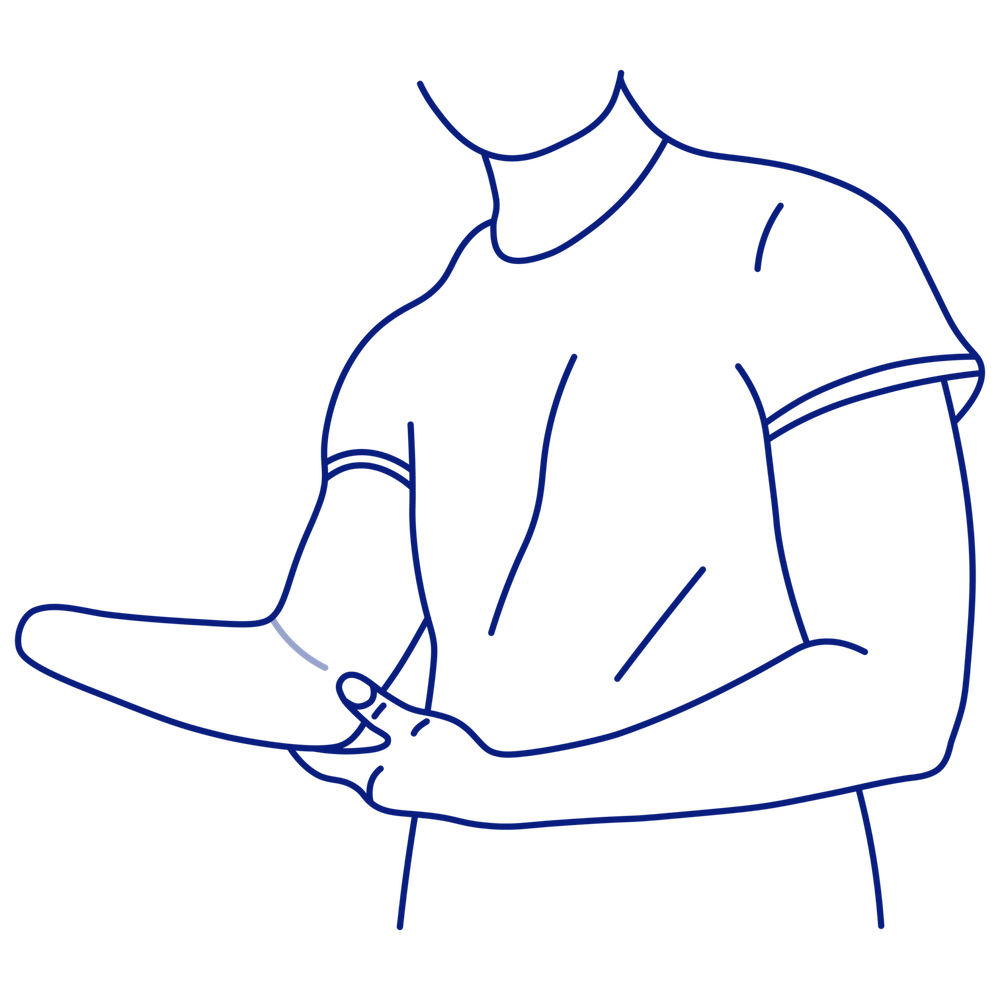
Take 3 Photos
Photo 1: Align the affected arm along the dashed line. Elbow touches the logo circle on the template.
Photo 2: Rotate the arm 90° so the medial epicondyle is centered on the logo circle.
Photo 3: Place both arms side by side on the template. Take the photo from at least 75 cm distance.
Send photos to macu4 for validation
macu4 will check that the photos meet the measurement requirements before you continue with the spacer calculator.
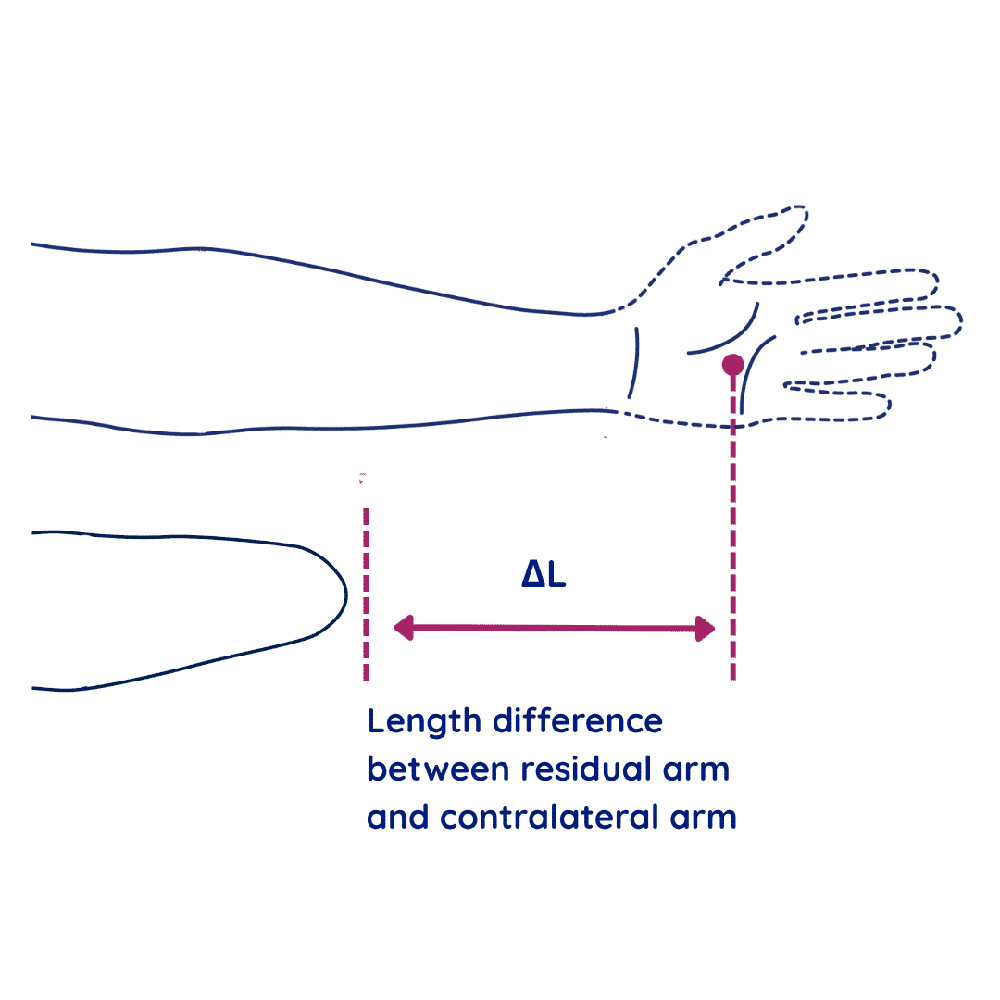
L4 — Affected arm
Measure from the Epicondylus Medialis to the distal part of the stump on the affected arm.
L5 — Non-affected arm
Measure from the Epicondylus Medialis to the middle of the palm on the non-affected arm.
Your Lumo Socket and Spacer
Based on your measurements and socket type, the calculator picked the closest available Lumo spacer size.
Tips
- Ensure good lighting and no shadows on the template when taking the photos.
- Hold the camera perpendicular to the template at 75 cm – 1 m distance.
- Lift the arm slightly so soft tissue does not flatten against the template.
- Available Lumo spacer sizes: A (20 mm), B (35 mm), C (50 mm), D (65 mm), E (80 mm).